Blog
Measurement system analysis (MSA) is a core factor in the metrology world, because it determines the capability of an instrument to complete a measurement task.
In production measurement technology, a measurement process analysis (MPA) or measurement system analysis (MSA) has to be carried out. MPAs or MSAs are useful to determine the accuracy of measurements in an experimental set-up and to assess measurement quality by making sure the measuring instrument is capable of completing the measurement task adequately and accurately.
There are different methods which can be used to determine the capability of the measuring equipment and the measuring process under real operating conditions – by means of repeated measurements based on standards or real samples, and with or without user influence. In general, these procedures are also known as Gage R&R (Repeatability & Reproducibility) methods. Different industry standards imply varying numbers of measurements, users, parts, repetitions and limits.
Cg and Cgk values define the measurement process capability, which is determined by analyzing the standard deviation/precision and the bias/trueness of a measurement system. Usually, a measurement system must have a measurement process capability Cg, Cgk > T, with T varying depending on the industry, company or component. The larger Cgk, the more capable the instrument – here is the mathematical formula behind it:

T … tolerance in the drawing
S … standard deviation of the measurement
xg- xm…. bias of the measurement in relation to a reference value
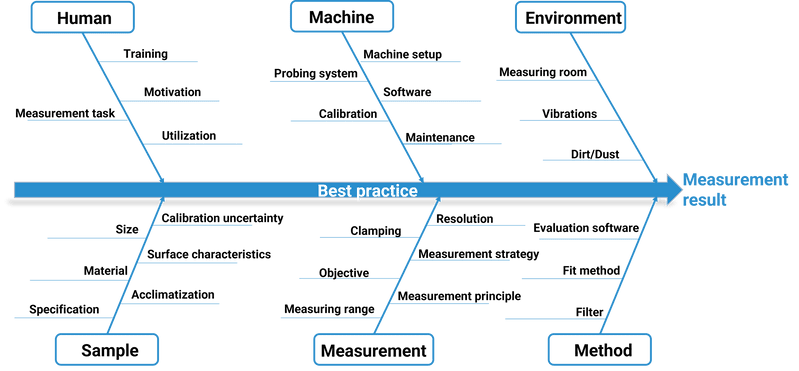
In practice, also influencing factors – e.g. human factors, the measuring device or the environment – should be reduced. See them here in the so-called Ishikawa diagram:
