Surface finish measurement systems to verify new gear manufacturing methods
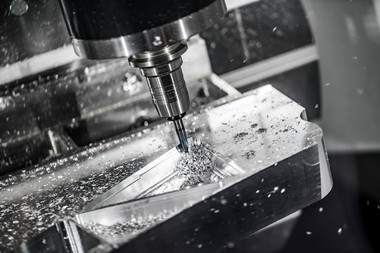
To help prevent cost-intensive postprocessing, Lund University used a simulation to calculate the ideal machine parameters for a form milling cutter. This was to ensure the tool would produce tooth flanks with optimum surface quality. The research team used Bruker Alicona systems at Sandvik Coromant to validate the mathematical models and verify their suitability for practical use. "Thanks to the high working distance, we were able to measure the roughness of tooth flanks that were previously inaccessible to us," lead researcher Mattias Svahn confirms.

Matthias Svahn
Lund University
Thanks to Bruker Alicona, we have been able to minimize the time and cost-intensive refining steps of gears. We were blown away by the capabilities of the InfiniteFocus system we got to know at Sandvik Coromant. There is no measurement system we know that is capable of measuring critical form and positional tolerances and roughness of tooth flanks in this way with just one system.
READ THE ENTIRE SUCCESS STORY
Increase efficiency in gear manufacturing with ideal surface quality
Due to global competition, cost pressure is constantly on the rise. This makes it necessary to increase the efficiency of processes in the manufacture of gearings. One of the major cost factors is post-processing, including refining steps such as grinding and honing to ensure the correct roughness of tooth flanks. This process could be minimized if it were possible to produce virtually perfect gears with optimum surface quality that need little to no post-processing. To make this a reality and ensure gears are produced with the desired roughness, it is critical to calculate the correct machine parameters for the tool used, e.g. for a form milling cutter. Roughness is chiefly determined by feed and cutting speed. These parameters also have an effect on gears' service life, fatigue and uniform transmission of motion. It is therefore of great economical interest to predict which roughness values result from different machine parameters.
How Lund University & Sandvik succeed with Bruker Alicona solution
InfiniteFocus
Dimensional accuracy & surface finish measurement
- Accurate, fast and universal optical 3D measuring instrument for tolerances in the µm and sub-µm range
- Components are measured area-based and with high resolution independent of size, material, geometry, weight and surface finish
- A number of proven and new features combine the functionalities of a roughness measuring system (Ra, Rq, Rz/Sa, Sq, Sz) with the characteristics of a coordinate measuring machine


