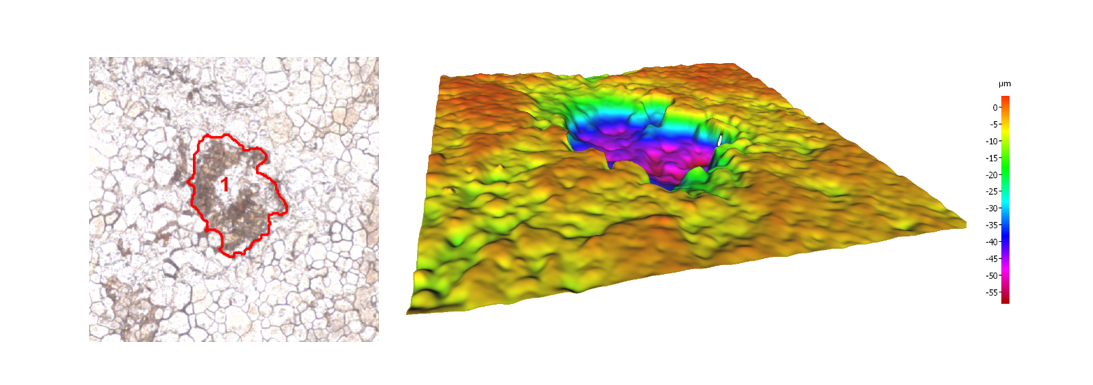
Optical 3D measurements of small-scale surface corroded areas
In quality assurance, it is important to check parts that have been exposed to corrosive atmospheres: Are they free of relevant three-dimensional surface corroded areas such as deep or shallow pits? This paper focuses on a 3D metrology device which contains special modules for fully automatic measurements enabling the classification of small-scale surface corroded areas.
Featuring the Focus-Variation technology, this system helps to obtain both 3D data and perfectly registered true color information, even for large areas. First, the surface is scanned laterally and vertically to obtain the depth data and the true color information. Second, special filtering stages are performed to restrict the classification to relevant area details with corrosion. Afterwards, the depth information is analyzed to detect the corroded areas, which are then listed in a table together with parameters such as depth, area, or volume. Also, a true color image of the whole surface with all marked corrosions is created. The measurement system is especially designed to allow fast corrosion measurements over large scan areas up to 200x200mm in high resolution. The range of measurements covers planar surfaces, but also cylindrical or other arbitrarily formed parts. Due to a special ring light illumination, the system is ideally suited for the measurement of challenging samples with large corrosive areas.
Measurement examples are
- Automatic measurements and classifications of corrosions on aluminum plates with corrosion depths of a few micrometers and on curved parts
- A comparison between manual corrosion segmentation and the automatic system
- Corrosion evaluations on steel samples
Authors: Danzl Reinhard; Stradner Juergen; Helmli Franz; Scherer Stefan. (2015). Automatic 3D measurement and classification. Conference: Eurocorr 2015 in Graz/Austria.

3D measurement of small-scale surface corroded areas


